Pearlized Enamel Effects Basics

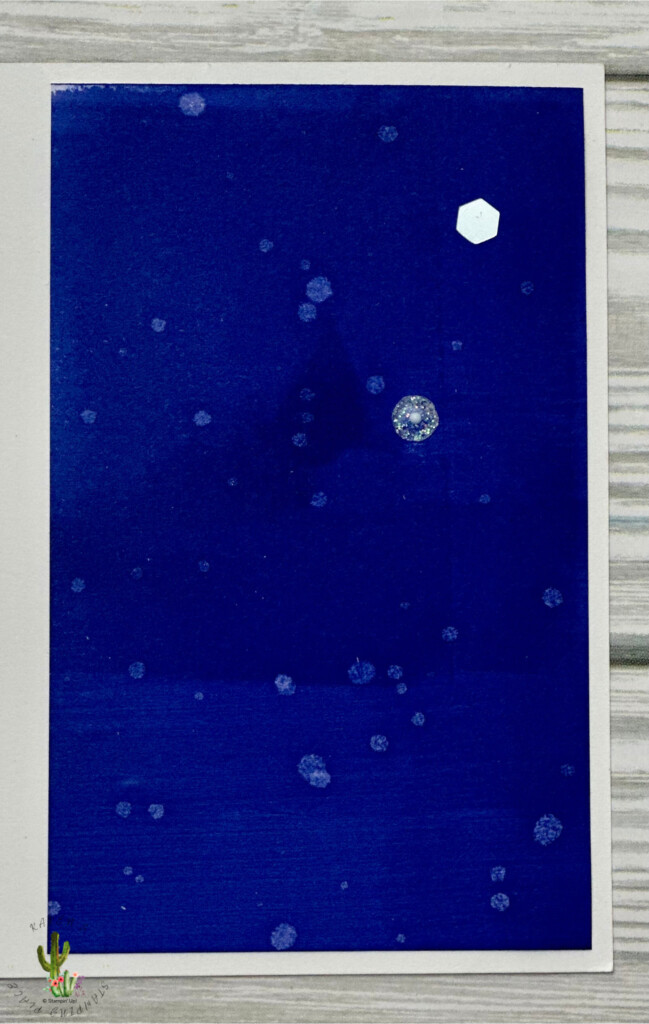
I am showcasing the Pearlized Enamel Effects Basics. This product has been carried over from the July to December Catalog, and I am so excited to show you how to use it.  The Pearlized Enamel Effects Basics can be used in so many ways, however the first way I am using it is to add a shimmer to my reinkers and paint with it.

The first thing you will need to do is add a drop of the Pearlized Enamel Effects Basics onto a clear block, your Sylicone Mat or something you have around the house. Then add a drop of reinker and a drop of water. I then mixed them together with the back of spoon. I found this to be the easiest way to mix them.


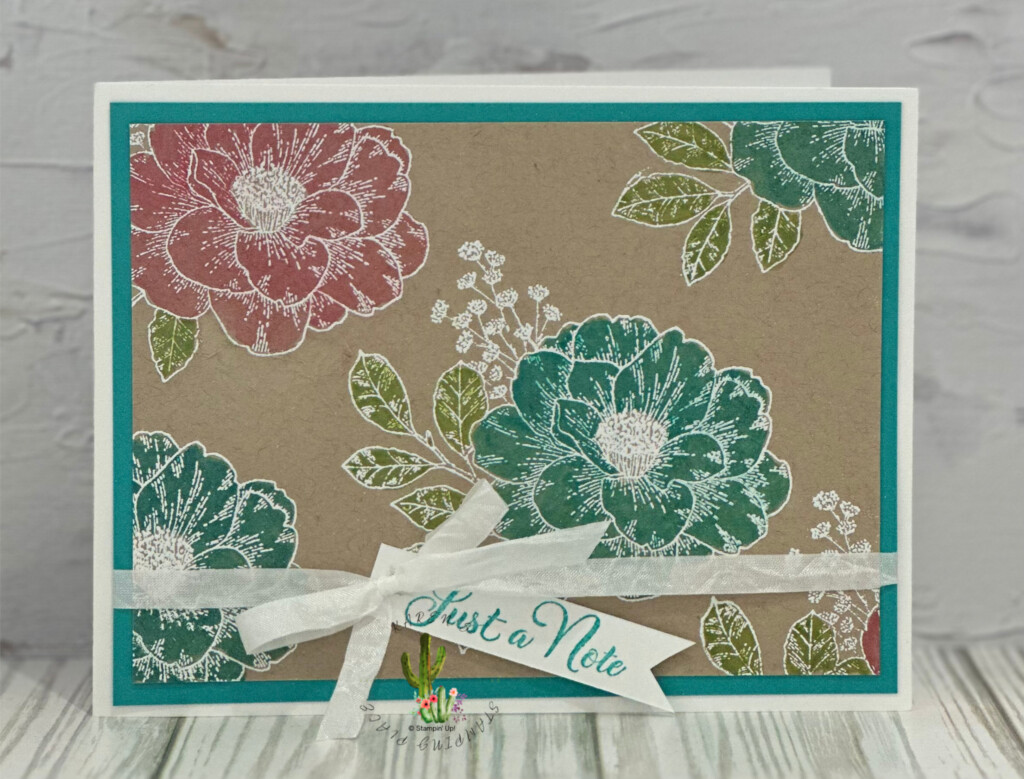
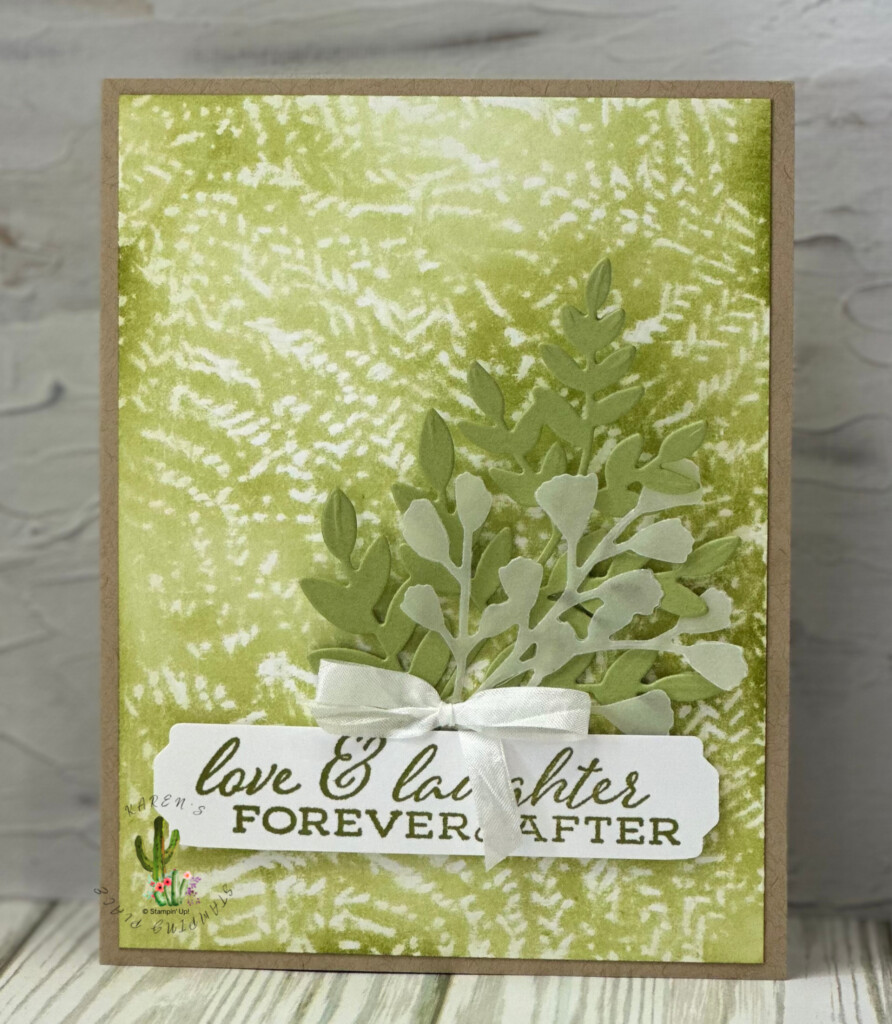
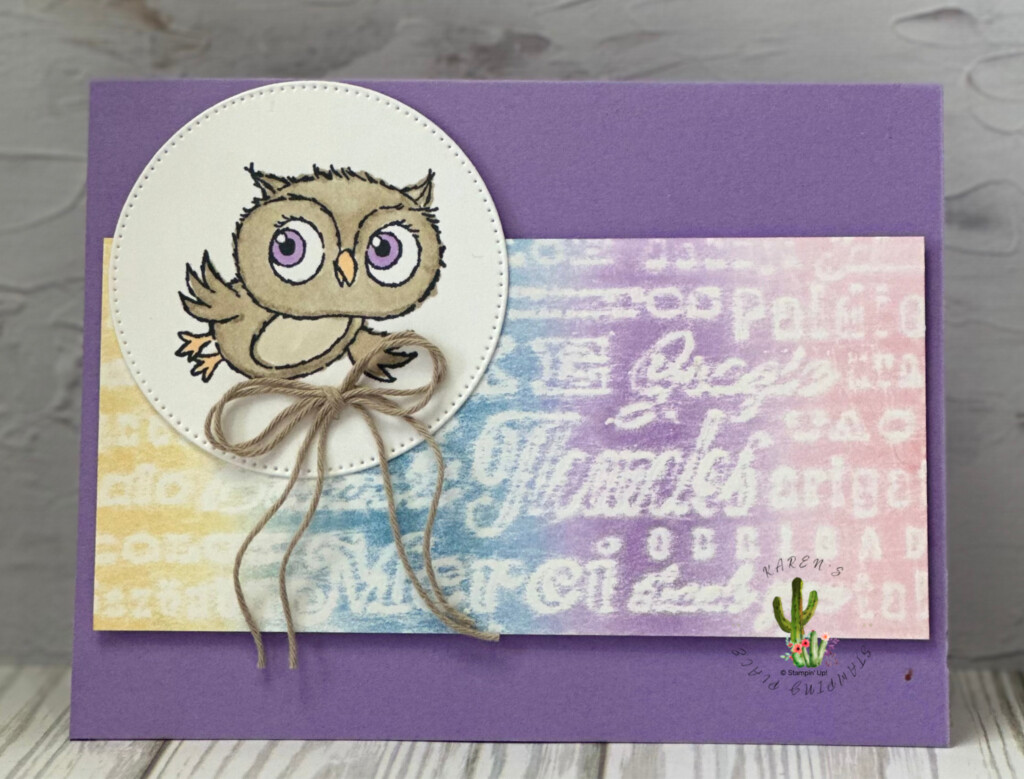
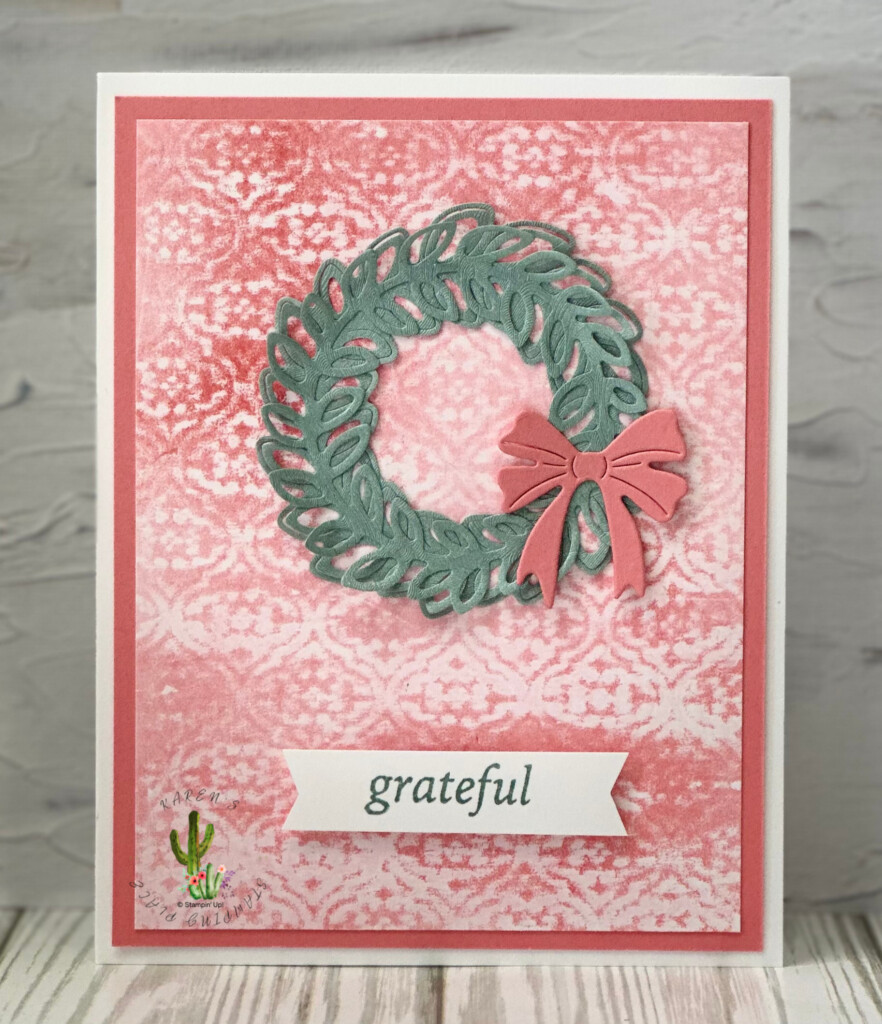
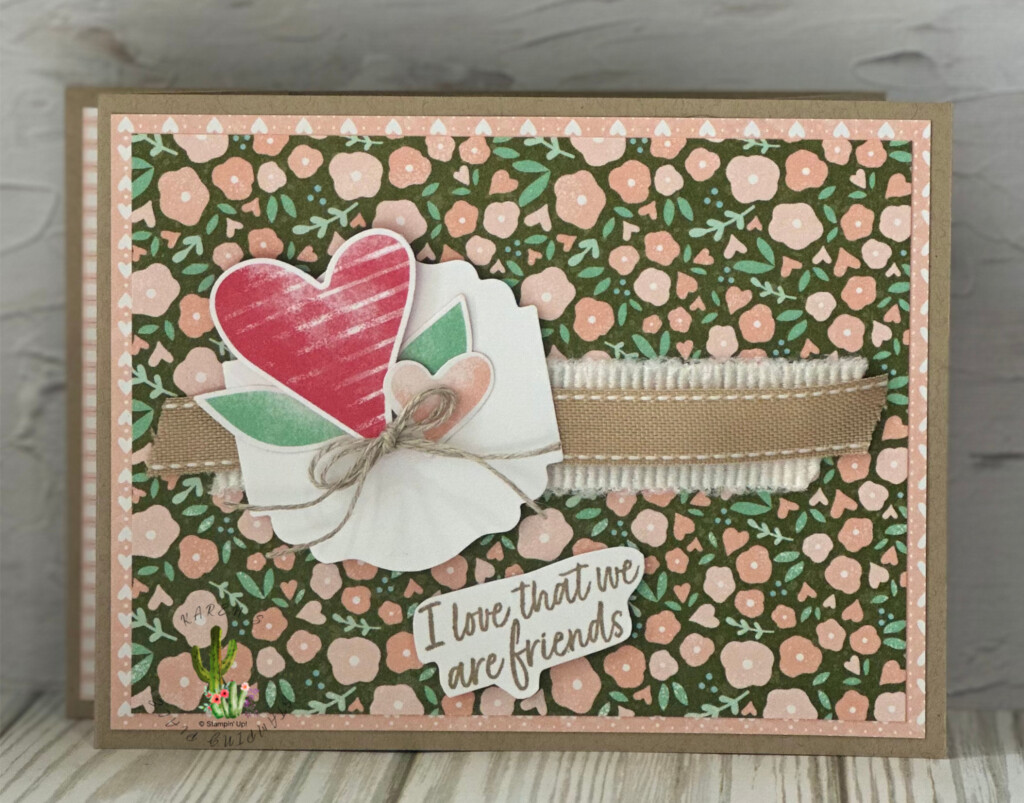
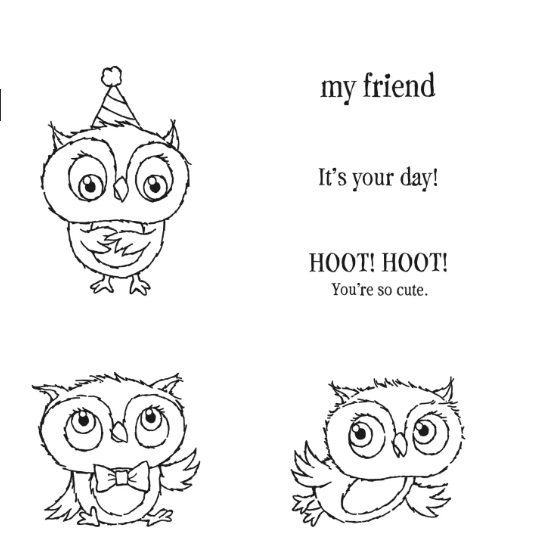
Next you will stamp you images on a piec of cardstock with Versa Mark Ink and the add White Embossing Powder. Heat set your image.

Using Water Painters you will pick some color up off of the block and paint it over the image. You can go over the white embossed area it will resist it. If it does not take a baby whipe and dab it to remove it.

In this card I used Granny Apple Green Reinker, Coastal Cabbanna Reinker and Flirty Flaming Reinker.

You will be able to find the Pearlized Enamel Effects Basics in my store.

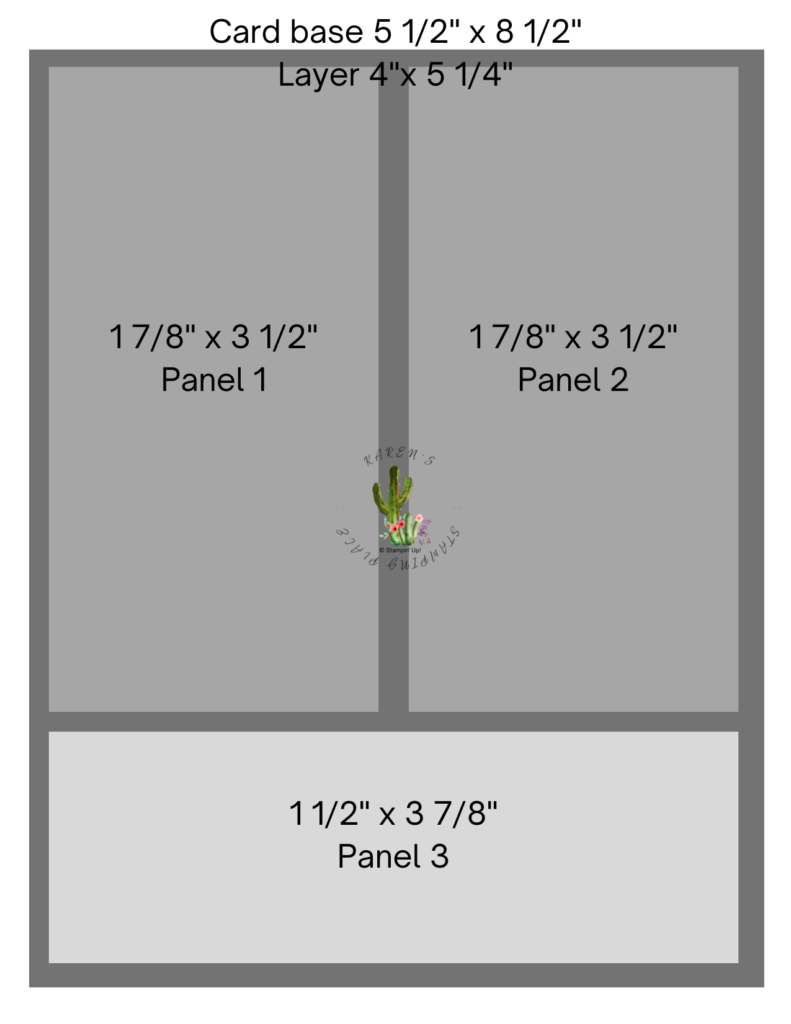
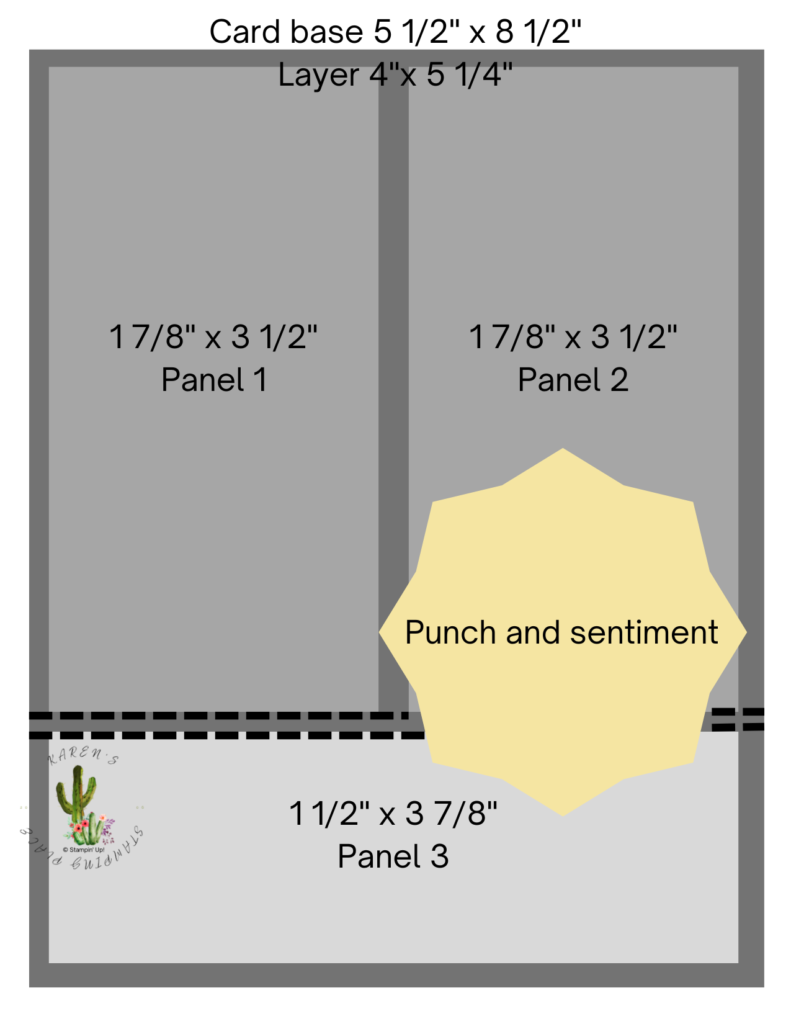
Measurements for my card:

Crumbcake layer 3 3/4″ x 5″

Coastal Cabanna Layer 4″ x 5 1/4″

Thick Basic White 4 1/4″ x 11″ scored at 5 1/4″

I made this card to show how to use the Pearlized Enamle Effects Basic from Stampin' Up!

Here is the video to show you how I created this card.

https://youtube.com/live/IQ2e9lMO5II

Take A Look at Everything Else I offer

============================================================

🤩 Order supplies, view additional photos, and so much more

at https://karensstampingplace.com/ and look for the blog post.

============================================================

🛍 Shop my Online store 24/7: https://karensstampingplace.com/shop

🔴 SUBSCRIBE TO MY YOUTUBE CHANNEL https://karensstampingplace.com/youtube

🗞 Join my Newsletter https://karensstampingplace.com/newsl…

💌Contact Me https://karensstampingplace.com/reque…

✅Request Catalog : https://karensstampingplace.com/reque… 

============================================================

Follow Me:

🌎Blog: https://karensstampingplace.com/blog

📌Pinterest: https://karensstampingplace.com/pinte…

🔵Facebook: https://karensstampingplace.com/facebook

🕐TikTok : https://karensstampingplace.com/TikTok

Create A Masculine Crayon Emboss Resist Card

I was coloring with my granddaughter and found a white crayon in her box. I got to thinking about a technique I have used many times and this white crayon. So I did a little research and some trial and error. I was able to create some cards with the Emboss Resist technique and the white crayon.

For this technique you rub the white crayon on the paper while it is in the embossing folder and emboss the paper. Next you have a choice to make: Watercolor brush or Blending Brush. Both of these are similar but some crafters have a preference. That is the reason I decided to try both. I featured the Crayon Emboss Resist technique using both coloring options in a recent YouTube video. (check out the link below the project) In the video, I made a masculine card using the Adorable Owls from the 2023 January and Feburary Sale-A-Bration Catolog. Using the Brick and Mortar 3D embossing folder from the 2022-2023 Annual Catalog made for a great background with this project.

With the Watercoloring portion of Crayon Emboss Resist technique you need a watercolor brush and an inkpad. Below is the picture of this version. 

Crayon Emboss Resist Technique

I used the Blending Brushes and an ink pad to evenly color the pictures you see below. With this option I was also able to make it multicolored.

Crayon Emboss Resist Technique

Here is the link to my YouTube video for this project.

Here are the other projects I did using the Crayon Emboss Resist technique.

Crayon Emboss Resist Technique Crayon Emboss Resist Technique Crayon Emboss Resist Technique

Take A Look at Everything Else I offer

============================================================

🤩 Order supplies, view additional photos, and so much more

at https://karensstampingplace.com/ and look for the blog post.

============================================================

🛍 Shop my Online store 24/7: https://karensstampingplace.com/shop

🔴 SUBSCRIBE TO MY YOUTUBE CHANNEL https://karensstampingplace.com/youtube

🗞 Join my Newsletter https://karensstampingplace.com/newsl…

💌Contact Me https://karensstampingplace.com/reque…

✅Request Catalog : https://karensstampingplace.com/reque… 

============================================================

Follow Me:

🌎Blog: https://karensstampingplace.com/blog

📌Pinterest: https://karensstampingplace.com/pinte…

🔵Facebook: https://karensstampingplace.com/facebook

🕐TikTok : https://karensstampingplace.com/TikTok

A Lovely Wiper Card

I hosted a “Cards That Move” class in person and this technique was one we used and was popular with those who attended. I thought I would create one to show on my most recent YouTube live. It truely did turn out to be “A Lovely Wiper Card”.

Using the Country Floral Lane Suite, from page 8 and 9 of the 2023 January to April Catalog, I created this heartfelt card. The Country Floral Lane Designer Series Paper and the Country Gingham Designer Series Paper paired will together for this project. I also used the punch to give the peek-a-boo suprise a lovely boost. The From the ribbon combo pack, I used the Burlap ribbon to break up the pattern on the front of the card. The ribbon coordinates so well with this suite. This project also required a trimmer or a scoreboard. If you don’t have either of these I highly suggest you check out my store. You can find both there.

One tip I can recommend is to make sure you use a strong adhesive like tear tape or our Stampin’ Seal +.

Here are the measurements and score marks for this project:

  • Two 4 1/4″ x 8 1/2″ pieces of cardstock, for your card base
    • Scored at 1 1/2″ and 3 ” for both
  • One 1 1/2″ x 3″ piece of cardstock, for your “wiper”
    • Scored on a diagonal at 1 1/2″


A lovely whiper card for a treat

Here are the products I used to create this card.


Check out my video for the full instructions! Click on the video below.


Take A Look at Everything Else I offer

============================================================

🤩 Order supplies, view additional photos, and so much more

at https://karensstampingplace.com/ and look for the blog post.

============================================================

🛍 Shop my Online store 24/7: https://karensstampingplace.com/shop

🔴 SUBSCRIBE TO MY YOUTUBE CHANNEL https://karensstampingplace.com/youtube

🗞 Join my Newsletter https://karensstampingplace.com/newsl…

💌Contact Me https://karensstampingplace.com/reque…

✅Request Catalog : https://karensstampingplace.com/reque… 

============================================================

Follow Me:

🌎Blog: https://karensstampingplace.com/blog

📌Pinterest: https://karensstampingplace.com/pinte…

🔵Facebook: https://karensstampingplace.com/facebook

🕐TikTok : https://karensstampingplace.com/TikTok

Z Fold Card Using The Adorable Owls

This Z Fold Card using the Adorable Owls was so much fun to make. It is a new Sale-A-Bration set that is sure to be extremly popular.  There is even a birthday owl! I can see this stamp set used for many occasions from birthdays to weddings. In addition, it is good for paper piecing, water coloring, coloring or even just as a lined image.

You can get this set for free by placing a $50 order in my Stampin’ Up! Store during Sale-A-bration.


My Adorable Owls card uses a swiping technique of two different color ink pads. I used Starry Sky and Orchid Oasis ink. It truly makes a night sky background. I also used our new smaller blending brush to add some Orchid Oasis to the Basic White Stylish Shaped Square. This added a bit of depth to the owl.


This is a close up of the panel I created using the Starry Sky Ink and Orchid Oasis Ink. The funny spots are sequins already glued onto the panel. I love how it looks like the night sky. Add a few drops of water and that makes it look like there are stars in the sky.

Swipping Ink Paper Technique


If you were on my Youtube Live today you heard the story of my Adorable Owls. Well here is the photo I promised. They are so cute and we were able to drive right up on them. I was sitting in the back seat so I was not able to get the best picture.

Owls on a Fence Post

Here is the video explaining how to make the card.


Take A Look at Everything Else

I offer

============================================================

🤩 Order supplies, view additional photos, and so much more

at https://karensstampingplace.com/ and look for the blog post.

============================================================

🛍 Shop my Online store 24/7: https://karensstampingplace.com/shop

🔴 SUBSCRIBE TO MY YOUTUBE CHANNEL https://karensstampingplace.com/youtube

🗞 Join my Newsletter https://karensstampingplace.com/newsl…

💌Contact Me https://karensstampingplace.com/reque…

✅Request Catalog : https://karensstampingplace.com/reque… 

============================================================

Follow Me:

🌎Blog: https://karensstampingplace.com/blog

📌Pinterest: https://karensstampingplace.com/pinte…

🔵Facebook: https://karensstampingplace.com/facebook

🕐TikTok : https://karensstampingplace.com/TikTok

Quick and Easy Card Layout

I have the cutest and most elegant cards all in one easy layout. Let me explain what I am talking about. I took this layout and made 3 cards with it. Now you can make so many more. The options are limitless. Add a punched sentiment and some ribbon, and you turn this layout into a pretty card.

.Card LayoutCard Layout with sentiment and ribbon

My first card was a Black and White Card. I used the Rustic Harvest Designer Series Paper in the July to December Mini. I also used the Handmade Wishes Bundle. This is such a nice bundle for your sentiments and the punch is really cute. This Layout made this card so simple to put together. There was not much planning that went into this.

Do not forget to decorate the inside of the card and the envelope! For the envelope just take the scrap paper and glue it to the flap of the envelope. Then cut it out!

Black and White Card  

For my second card I used the Santa Express Designer Series Paper also out of the July to December Mini Catalog. This paper is so cute! With my scraps I was able to put this card together! I used the Handmade Wishes Bundle for the sentiment and then added a Decorative Circle Punch behind the sentiment. Behind all of that I added Evening Evergreen Open Weaved Ribbon.

For my last card for today. I used the Lights Aglow Designer Series Paper, as well as the Glimmer Paper in gold.  I embossed the sentiment from Handmade Wishes Bundle in Gold Embossing Powder. This card turned out to be really elegant.

.

Here is the video of these cards: https://youtu.be/OLDG7cTbiD8


Take A Look at Everything Else I offer

============================================================

🤩 Order supplies, view additional photos, and so much more

at https://karensstampingplace.com/ and look for the blog post.

============================================================

🛍 Shop my Online store 24/7: https://karensstampingplace.com/shop

🔴 SUBSCRIBE TO MY YOUTUBE CHANNEL https://karensstampingplace.com/youtube

🗞 Join my Newsletter https://karensstampingplace.com/newsl…

💌Contact Me https://karensstampingplace.com/reque…

✅Request Catalog : https://karensstampingplace.com/reque… 

============================================================

Follow Me:

🌎Blog: https://karensstampingplace.com/blog

📌Pinterest: https://karensstampingplace.com/pinte…

🔵Facebook: https://karensstampingplace.com/facebook

🕐TikTok : https://karensstampingplace.com/TikTok